Wigs are popular among African Americans these days because they can help women change their hairstyle instantly without causing damage to their natural hair, generate a brand new look on the whole, offer versatile hair options, and boost self-confidence. Except for the most common choice of lace frontal wigs and lace closure wigs, an increasing number of women are turning to the 360 lace wig for more elaborate styles and better wearing experience. With 360 wigs human hair, you can have access to versatile and natural-looking styles, from a sleek high ponytail to a messy updo and everything in between. This blog offers guidance on different styles to embrace for your reference.

Before learning how to make elaborate styles with a 360 lace wig, let’s start with how to install it in the right way. Although it seems to be a daunting task for those who are new to this wig style, don’t worry! We’ll guide you through the installation process step by step to help you accomplish it effortlessly and achieve a flawless appearance.

360 Wig Install
Prep your natural hair
First, getting your natural hair well-prepared for the 360 wig install is important. You can braid your hair flat against your head and put on a stocking cap to keep them in place. This step will ensure your wig is secure and comfortable throughout the day.
Attach the stocking cap
Make sure your nape and the hairline are neat and don't have any flyaway that's gonna interrupt placing the wig down. Put the glue a little bit off your hairline so it's not difficult to take the glue off when you’re ready to remove the wig. Then you are going to attach our stocking cap to this line now, remember if you want the stocking cap to stick on the nape as well as the wig lace on the nape, you have to make sure that the skin back there is totally cleansed and dry. If it's a little bit moisturized or has oil on it, or if it's not properly cleansed, then the lace is not going to stick all right. When the glue turns clear, you can go ahead and press the cap inside the glue so it kind of comes through the cap a little bit.
Apply your wig
Next, you can begin the installation process. Start by placing the 360 frontal wig on your head and adjusting it to fit snugly. It's important to ensure no gaps between the edges of your skin and where they meet with lace.
Once you've positioned the wig, it's time to secure it. You can trace the entire hairline with an eyeliner pencil before gluing it down. To secure the lace around the perimeter of your head, you can apply two coats of glue. After the second coat is clear, go ahead and stick the lace on and the wig has to fit perfectly from front to back. If you don't want to accidentally pull the front too far forward and end up showing the cap in the back, everything has to be calculated before you glue it down. It's best to work from front to back to avoid getting any glue on visible parts of your scalp. This will help keep things neat and give you a seamless and natural look.
Tips: to make the back look really nice, make sure to put your head down before you stick the lace on because if you stick the lace on while your head is up, the moment you put your head down, it's going to pull up the lace.
Cut and trim the lace
After you've applied the glue, cut off excess lace around the edges if necessary. The edges should be even with each other without any extra material hanging past them. If the lace looks a little bit light, fix it at the end. This step will give you a clean and polished look.
Style your wig
Wait a few minutes while the glue gets dried, then you can style your wig as desired. Go ahead and comb the hair so it's not sticking to the glue and give it a nice press until it's secured. You can either curl, straighten, or leave it as it is. The 360 lace wig gives you much flexibility with styling options, so feel free to experiment and find a look that suits you.
Apply hairspray to shape your hair
To finish the process, you can use hairspray to keep your wig in place and look perfect all day. This will help prevent movement or slippage and boost your daily confidence.
Now that you’ve made it, congratulations! You'll be rocking your new wig quickly. When it comes to styles for 360 wigs, a high ponytail always comes as the first thought. It’s the most common and typical style for it, and this style is one of the major reasons why people love them.
How to put up a high ponytail
Step 1: Use a wide-tooth comb and gather your hair to mold it into a ponytail. Then use the wide-tooth comb and smooth the hair out and begin to mold it into the form that you want for your ponytail.
Step 2: Position whether you decide to do it in the middle if you want to do a low ponytail. That is up to you. Then add the mousse it will help sculpt and mold the hair and ensure that everything is laid nice and smooth in wet conditions.
Step 3: Take the hot comb to it so it can just go in the direction you desire. Since it’s a 360 frontal wig, instead of a full lace wig, you may have a littletrouble hastening the hair to go up without looking lumpy and to do a look that’s a little more relaxed and almost like a messy ponytail because it's not going to get fully neat. Take a comb and tease back a little to make it looser and more natural.
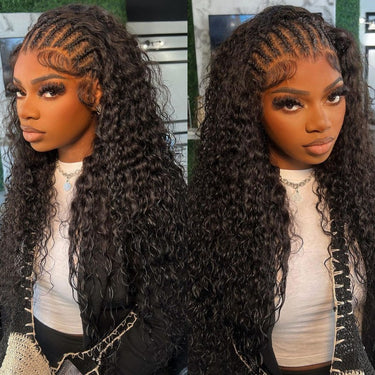
Pre-plucked Water Wave Hair 360 Lace Wig Human Hair Lace Front Wigs For Sale
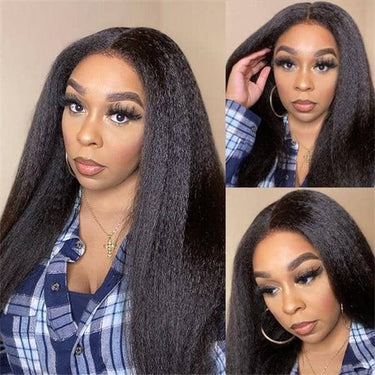
Kinky Straight Hair Pre-plucked 360 Lace Frontal Wigs With Baby Hair
Final Words
Perhaps you used to get so intimidated by doing frontal ponytails that you just want to avoid them all together. In fact, it is attainable with a little patience and practice. There are other fun and cute styles that can be achieved with a 360 wig. For example, you can even wear your ponytail in a high or low bun. It is a perfect style to keep away from hair sweating when playing in the gym. If you’re kind of a bold girl, you can even slay your edges and sideburns for a more creative look.
By the way, YMY Hair wishes you a Merry Christmas and a happy New Year!


